
The challenge
This side project was inspired by a Reddit post I saw over the holidays. The player claimed the TowerMadness Zero free-to-play world record, without spending money on in-game add-ons, with a score of around 2,407,148 points.
This article covers how I profiled the gameplay and tackled the problem with an HPC engineer’s mentality.
What is TowerMadness?
TowerMadness is a tower-defence survival game. The goal is simple: keep the aliens away from your sheep, which act as your lives, and survive for as long as possible. Killing more aliens and surviving boss levels earns more points and bonus points.
The project was equally simple: beat the TowerMadness Zero world record using everything available except paid add-ons.
Applying an HPC mindset
I wanted to see how the way we think about games could connect to the mentality we use in HPC engineering, particularly how we analyse the mathematics, mechanics, and design of a system.
Three weaknesses in the previous strategy
Given my experience with the game, I began by analysing the map used by the previous record holder. I spotted three weaknesses:
- Tower choice. The strategy prioritised missile towers and nukes, both of which have low attack density.
- Fixed routing. Following the map’s fixed route created underused opportunities and dead space. Towers cannot be built on the dirt paths or trees shown in the image.
- No alien batching. The strategy did not cluster aliens to maximise the spread damage dealt by towers.
Working assumptions
- At the late-game stage, tower cost should not be the limiting factor because every tower will eventually be fully upgraded. Usable space is the resource to optimise.
- I assumed the previous world record was achieved on Easy mode. That was the only difficulty on which reaching several million points appeared feasible.
Rail guns for the ground, air defence for the sky
The table compares each fully upgraded tower’s damage per second and special effects.
| Tower | Target | DPS | Special effect |
|---|---|---|---|
| Stun gun | Air and ground | 7,125.2 | 35% chance of stunning for 4.75 seconds |
| Laser gun | Air and ground | 7,783.6 | None |
| Rail gun | Ground | 18,425 | Piercing damage along its line of fire |
| Cannon | Air and ground | 1,118.7 | Splash damage and fixed burning damage |
| Missile tower | Air and ground | 2,790 | Splash damage |
| Air defence | Air | 23,500 | Splash damage |
| Tesla tower | Ground | 11,768.6 | Attacks multiple enemies at once |
| Boost tower | Non-attacking | 0 | Boosts adjacent towers by 240% |
| Glue tower | Non-attacking | 0 | Slows enemies by 60% |
The rail gun appears to be the strongest choice for ground damage. It has the highest ground DPS and also produces piercing damage if the aliens can be lined up effectively.
In this version of the game, cannon towers apply a fixed amount of burning damage rather than a percentage. That becomes negligible against high-level aliens with very large health pools.
The strategy will therefore combine dedicated ground and air damage through rail guns and air-defence towers. This choice will heavily influence the map layout later.
Version note: TowerMadness 2 significantly reduced the rail gun’s damage.
Why boosting is always worthwhile
Assume each adjacent attacking tower deals x damage per second. With eight adjacent towers:
Boosted damage = 8x × 240% = 19.2x
Placing a boost tower means sacrificing one tile that could otherwise hold an attacking tower. At a 240% boost, however, there is no configuration in which leaving the damage-dealing towers unboosted makes sense.
The effect does not stack, so surrounding a single weapon with eight boost towers offers no additional benefit. Instead, the mechanic rewards the tightest possible clusters of attacking towers around each boost.
Version note: TowerMadness 2 reduced the boost to 150%, making the trade-off more significant.
The hidden cost of a stun lock
Suppose there are four stun guns, each with a 35% probability of stunning an alien. The probability that at least one shot applies a stun is:
P(at least one stun) = 1 - (0.65)^4, approximately 82%
That sounds ideal for boss rounds: adding more stun guns can keep a high-health alien almost permanently locked in place. In one attempt, however, it backfired.
The stun guns’ long range caused all of them to target a boss near the entrance, while only three rail guns could reach it. Until that boss died, the stun guns could not control anything else.
Takeaway: stun locking is useful only when the surrounding damage towers can reach the same target. The stun guns should sit toward the back of the map so that they stop aliens inside the main damage zone.
Version note: TowerMadness 2 addressed this by allowing towers to target the first, last, or strongest alien.
Increase the density of every shot
This mechanic is straightforward. During a wave, once the first and last aliens come into contact with a glue gun, the slower leading aliens allow those behind them to catch up. The wave clusters together, enabling splash-damage towers to hit more aliens with each shot.
The glue gun therefore provides two benefits: it increases the density of damage dealt in a region and buys more time to eliminate the wave.
Routing starts with the map
The strategy above, together with each tower’s range, favours a very open map with little foliage, dirt, or structures. Every blocked tile reduces the proportion of attacking towers to boost towers and lowers the total damage density.
The chosen map therefore needed to support two things:
- The longest possible route for ground aliens
- Active rerouting during a wave
One defence, two movement systems
TowerMadness allows the player to route ground aliens. If towers block the shortest path, those aliens must reroute through the remaining opening.
Planes are the harder constraint. They have more health and ignore every rerouting effort, flying directly toward the end zone. My placement therefore covers that direct flight path with as much air defence as possible, even though doing so weakens the ground defence.
The balancing problem: maximise ground damage through routing while committing enough space to air defence, because planes will always be the limiting factor.
Force the wave to change direction
The design contains two routes: a damage side and a delay side. By selling the stun gun at position 1 and placing another at position 2, I can close one route and force the ground aliens onto the other.
The purple delay route is filled with stun guns and glue guns. At this stage it cannot kill the aliens by itself; its job is to buy time while the rail guns on the red damage route clear the enemies already there.
Switching between the two paths lets the same ground-defence cluster serve the wave for longer, effectively virtualising the available damage.
The painful part is timing. Each run takes around three hours before reaching the point where active routing becomes necessary and I have to pay close attention to every change.
Bringing every mechanic together
The last difficult factor is balancing the maximum amount of air defence, which remains the limiting factor, with enough rail guns to clear the ground aliens routed through the damage side.
- Ground-damage side: maximise the number of rail guns. Four stun guns near the bottom provide effective boss stun locking only after a boss has crossed the main damage field.
- Air-defence side: keep the planes’ direct path inside the red region covered by the air-defence towers.
- Delay side: layer the stun and glue towers so they can also slow boss planes and ordinary planes long enough for the air defence to finish them.
One limitation remained: I could not safely reroute during a plane round. Ground aliens would occupy the stun guns’ targeting, allowing the planes to pass without being stunned. That was a mistake I did not fully optimise out of the final run.
From 2.4 million to 7.95 million
Each attempt revealed problems that shaped the next map: poor routing, insufficient air-defence coverage, and an incomplete double-routing design.
| Run | Score | Improvement over benchmark |
|---|---|---|
| Previous benchmark | 2,407,148 | 0% |
| Attempt 1 | 4,944,457 | 105.4% |
| Attempt 2 | 5,599,478 | 132.6% |
| Attempt 3 | 7,949,710 | 230.3% |
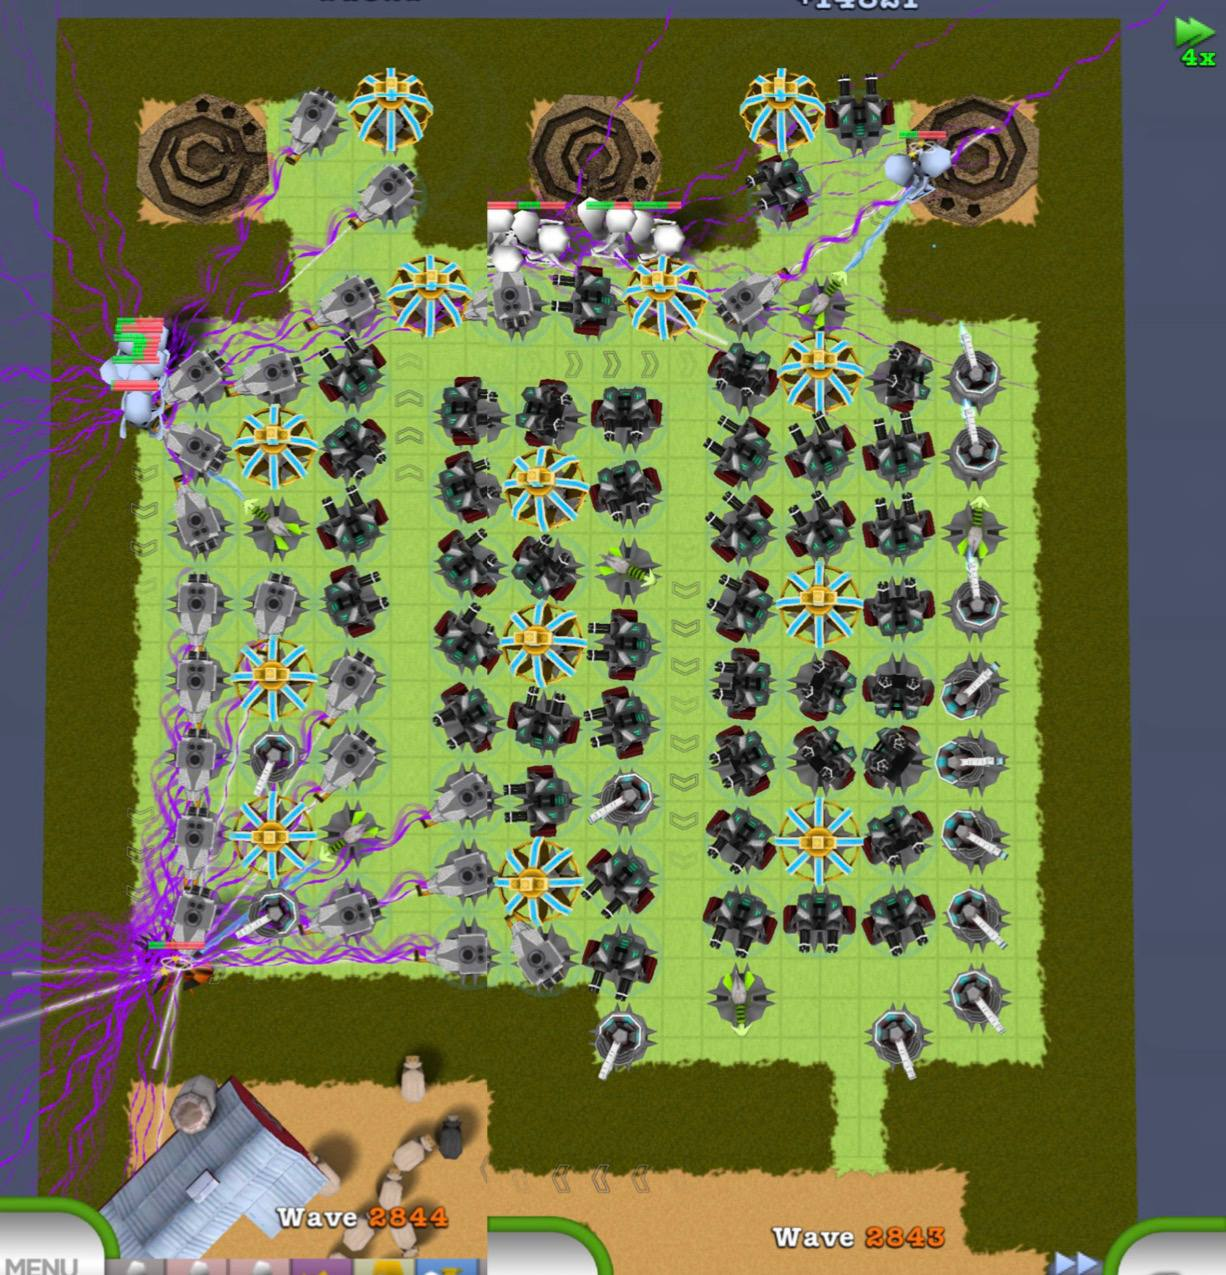
I first lost a sheep at around 7.1 million points because of poor active routing.
I completed all three attempts while travelling overseas. Repeating the experiment in Singapore would be difficult to justify casually: every serious run takes roughly three hours before reaching the stage where the routing decisions become demanding.
What I would optimise next
The previous record was beaten by more than threefold, but I think the strategy still has room to improve:
- Test a larger map. Larger maps usually have poorer tower density, but their longer direct route could give air defence more time to attack planes.
- Refine the tower placement. The final attempt revealed several small positioning decisions that were not optimal.
- Keep learning from the community. TowerMadness has a small community, but the deleted Reddit user’s post was enough to send me down this wonderful rabbit hole.
Either way, I thoroughly enjoyed being a try-hard gamer and profiling the game as an engineering system.